
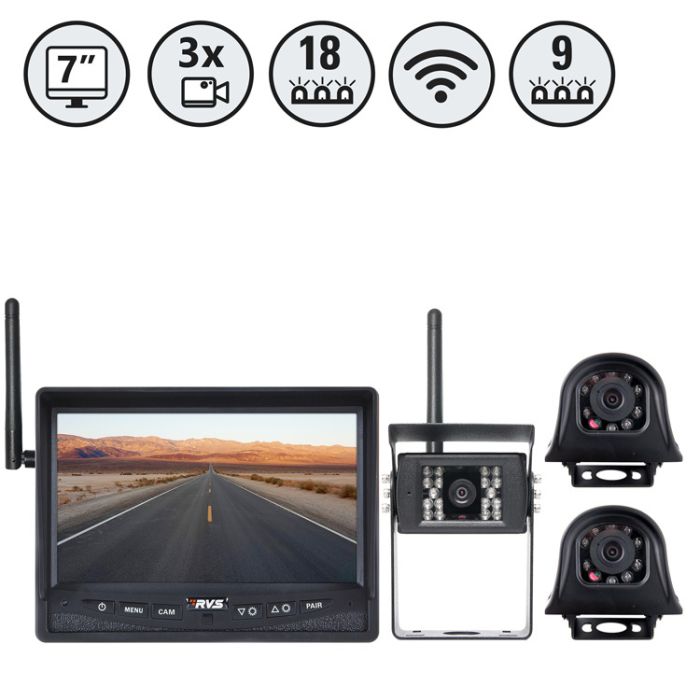
Wireless backup cameras help you see behind your vehicle and avoid collisions.
If you drive in tight lots, tow a trailer, or back into dark alleys, a clear rear view is gold. I’ve installed and tested wireless backup cameras on sedans, trucks, and RVs for over a decade. In this guide, I’ll break down how wireless backup cameras work, what to buy, how to install them, and the real pros and cons. You’ll get expert tips, simple steps, and hard-won lessons you can use today.

What Are Wireless Backup Cameras?
Wireless backup cameras are rear-view cameras that send video to a screen without a long video cable. They use radio to link the camera to a display, mirror monitor, head unit, or phone. Power still comes from your vehicle wiring or a small battery or solar panel.
Most kits include a camera, a transmitter or built-in radio, and a screen. Many add parking lines, night vision, a microphone, or split-screen views. Some kits support more than one camera for side views.
Wireless backup cameras use digital links at 2.4 GHz or 5.8 GHz. Good systems use a secure, low-lag link. This keeps video stable even when you drive near Wi‑Fi. Weatherproof ratings, like IP67 or IP69K, tell you how they handle rain and wash downs.
Wireless backup cameras fit many mounts. You can use a license plate frame, a flush mount in the bumper, a brake light mount on vans, or a surface mount on an RV cap. You can power the camera from the reverse light, an accessory fuse, or a dedicated feed.
How Wireless Backup Cameras Work
When you shift to reverse, the camera powers up and sends video over radio. A paired screen receives the feed and shows a live view with guide lines. Some apps run on your phone and act as the screen.
Digital links use frequency hopping to dodge noise. Latency ranges from about 120 ms to 300 ms on most kits. That is fine for backing up. Resolution ranges from 720p to 1080p. Wider fields of view help, but too wide can distort depth. A sweet spot is 120 to 150 degrees.
At night, cameras use large sensors, fast lenses, HDR, or infrared LEDs. True low-light “starlight” sensors beat basic IR for detail and color.
Benefits of Wireless Backup Cameras
Wireless backup cameras reduce blind spots. They help you see kids, pets, curbs, and poles. That peace of mind is hard to beat.
Key gains include:
- Faster install. No long video cable to run through the cabin.
- Flex mounts. Fit cars, pickups, vans, RVs, and trailers.
- Better hitching. Line up a ball mount in one try.
- Less risk. Lower chance of small bumps that still cost big money.
- Upgrade path. Add side cams or a second rear cam later.
Crash data shows backover incidents are a known risk in large vehicles. A clear rear view helps cut that risk. Wireless backup cameras add that view to older cars at a fair cost.
Limitations and Common Pitfalls
Wireless backup cameras are not perfect. Know these trade-offs.
- Interference can cause dropouts. Thick metal, long RVs, or crowded Wi‑Fi zones make it worse.
- Power is still wired. The “wireless” part is the video link.
- Latency exists. It is small, but you should move slow while backing.
- Weather can stress seals. Cheap cams fog or corrode over time.
- Phone-only kits depend on your app and phone OS updates.
Two common mistakes I see: mounting too high and using a weak ground. A high mount can hide low hazards behind your bumper. A bad ground causes flicker. Place the cam near plate height and ground to bare metal.
Types and Use Cases
Wireless backup cameras come in several forms:
- License plate frame cameras. Clean look and easy mount on most cars.
- Surface-mount bullet or box cameras. Tough and great for trucks and RVs.
- Third brake light cameras. Ideal for vans and work trucks.
- Flush-mount cameras. Sleek but need a hole in the bumper.
- Solar cameras. Fast install on plates, but watch battery life in cold weather.
Use cases:
- Cars and SUVs. Simple kits with a mirror monitor are popular.
- Pickups. A rear camera plus a trailer camera makes hitch work easy.
- Trailers and fifth wheels. Use a long-range digital link and an external antenna.
- RVs and buses. Choose split-screen systems with side cams.
Wireless backup cameras shine when a full wire run is hard. Long vehicles, leased cars, and fleets benefit most.
Key Features to Compare Before You Buy
Focus on the parts that shape safety and ease of use.
- Image quality. 1080p sensors with HDR give clear detail in sun and shade.
- Field of view. Aim for 120 to 150 degrees to balance width and depth.
- Night vision. Look for low lux ratings or starlight sensors over basic IR only.
- Wireless tech. Digital FHSS at 2.4 or 5.8 GHz helps avoid dropouts. Encryption adds privacy.
- Range. Long RVs need true long-range links and better antennas.
- Weather rating. IP67 or IP69K handles rain and pressure wash.
- Display. Mirror monitors save space. Dash screens are larger. Phone apps are flexible.
- Guide lines. Adjustable lines match your vehicle size. Look for on/off control.
- Multi-cam support. Useful for side or trailer cams.
- Power options. Reverse-only or constant power for rear-view while driving.
- Build quality. Metal housings and glass lenses last longer than soft plastic.
Make a short checklist. Compare two or three kits that meet your must-haves. Wireless backup cameras vary a lot on these points.
Installation Guide (Step-by-Step)
You can install most wireless backup cameras in about one to two hours with basic tools.
Plan your setup:
- Pick the mount spot near plate height.
- Plan your power source. Reverse light for auto-on. Accessory fuse for always-on.
- Test the kit on the bench before routing wires.
Tools you may need:
- Trim tool, small sockets, and screwdrivers.
- Wire stripper, crimper, and heat-shrink.
- Multimeter to confirm power and ground.
- Fuse tap and ring terminals.
Steps:
- Mount the camera. Aim level. Protect the cable with loom.
- Find the reverse light wire at the tail lamp. Verify with a multimeter.
- Splice power and ground. Use a fuse tap and a clean ground point. Crimp well.
- Route the camera’s short harness to a safe spot. Avoid sharp edges and hot parts.
- Mount the display. A mirror monitor clips on. A dash screen uses a stand or adhesive.
- Power the display from accessory power. Hide the cable.
- Pair the camera to the display. Follow the on-screen steps.
- Test in daylight and at night. Adjust the angle and guide lines.
- Secure all wires. Use zip ties and loom.
Safety tip: Disconnect the battery when working near airbags or live circuits. Go slow and test each step.
Troubleshooting and Optimization
If video drops or lags, try this:
- Move the receiver higher on the dash for a clearer path.
- Add or adjust external antennas if your kit supports them.
- Reroute power away from noisy circuits or add a noise filter.
- Choose another channel in the menu if offered.
- Update firmware on the display or app.
If the image looks poor:
- Check lens focus and clean the glass.
- Turn off digital zoom and enable HDR if you have it.
- Reduce angle. Too wide can warp depth sense.
If power is flaky:
- Re-crimp connectors. Loose joints cause reboots.
- Use heat-shrink and dielectric grease to seal tail light splices.
- Confirm the ground is on bare metal.
Wireless backup cameras work best when the link is clear, power is clean, and the mount is solid.
Real-World Experiences and Tips from the Road
On my Tacoma, a plate-frame camera made hitching a camper a one-shot job. I tied power to the reverse light. The mirror monitor kept the dash clean. I learned to aim the camera so the bumper sits at the bottom edge of the screen. That shows hazards near the tires.
For my parents’ Class C RV, the first kit lagged and cut out near gas stations. I swapped to a long-range 5.8 GHz kit with better antennas. Signal issues went away. The lesson: bigger rigs need better radios and antennas.
On a work van, I used a brake-light camera and a dash screen. It runs constant power, so the driver can glance back on the freeway. It helps spot tailgaters and bikes in the blind spot.
Mistakes I made early on:
- I trusted vampire taps. They failed in winter. Use solid crimps or solder and heat-shrink.
- I mounted too high on an SUV. I missed parking blocks. Plate height worked better.
- I skipped a bench test once. The display was dead. Always test before you route wires.
Wireless backup cameras reward careful planning. A few small choices make a big difference.
Cost, Value, and ROI
Wireless backup cameras range by build and features.
- Budget kits: $50 to $100. Fine for small cars. Expect basic image.
- Mid-range: $120 to $250. Better sensors, HDR, and stronger links.
- Premium: $250 to $600. Multi-cam, rugged housings, and long-range radios.
Pro install can run $100 to $300 per vehicle. Long RVs cost more. Even one avoided bumper tap can pay for a mid-range kit. Backover crashes are costly and tragic. A clearer view is a modest price for better safety.
If you tow or drive a tall vehicle, value rises fast. Wireless backup cameras also help resale. Buyers like simple safety upgrades.
Frequently Asked Questions of wireless backup cameras
Do wireless backup cameras work while driving forward?
Yes, if you wire them to accessory power. Many drivers keep the view on when towing or merging.
Are wireless backup cameras legal in all states?
Backup cameras are legal, but front displays have rules in some states. Check local laws on screens in view of the driver.
Will a wireless camera drain my battery?
Not if wired to reverse power. Always-on setups should use accessory power and sleep modes.
Can I use my phone as the display?
Yes, app-based kits stream to your phone. Keep in mind app updates, notifications, and screen brightness.
How do I avoid interference?
Use a kit with digital FHSS and a good antenna. Mount the receiver high and away from metal.
What field of view should I choose?
About 120 to 150 degrees balances width and depth. Wider can warp lines and distance.
Can I add cameras to the sides of my RV?
Yes, many systems support two to four cameras. You can view split screens or cycle views.
Do solar wireless cameras work in winter?
They can, but short days and cold cut battery life. Recharge or wire a backup power feed if needed.
How long do these cameras last?
Quality cameras last years with good seals and wiring. Cheap housings can fog or crack.
Are guide lines accurate?
They are close, but you should test and adjust. Use cones to match your vehicle width and length.
Conclusion
Wireless backup cameras give you a clear, simple way to see more and stress less. They install fast, work on almost any vehicle, and turn tricky backing into a calm routine. Pick solid image quality, a strong radio link, and the right mount. Then install with care and test in real spots you park.
Try one change this week. Measure your mount spot, set a budget, and shortlist two kits. When you are ready, install it or book a pro. Want more tips or a step check? Subscribe for new guides, or leave a question in the comments.