
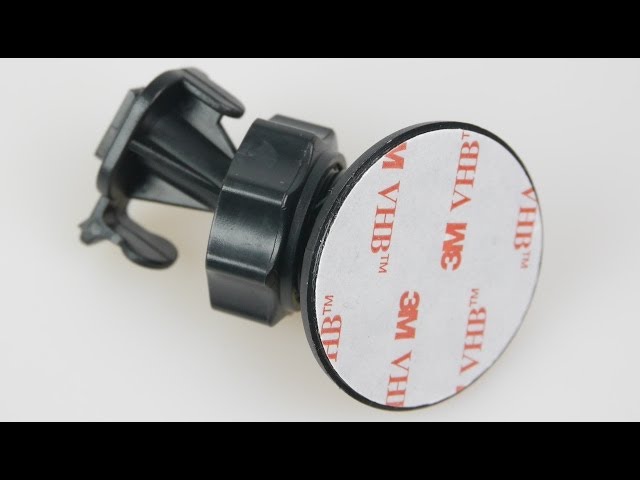
Heat the adhesive, then gently pry or slide the mount off using dental floss or a plastic card.
Removing a 3M dash cam mount can feel tricky, but with the right steps you can remove it cleanly and safely. I’ve removed several 3M mounts from different cars, so I’ll share proven methods, tools, and tips. Read on for step-by-step instructions on how to remove 3m dash cam mount, how to handle residue, and how to avoid damage to your windshield or dash.

Why removing a 3M dash cam mount matters
Many people wonder how to remove 3m dash cam mount without cracking glass or leaving sticky residue. A poor removal job can damage glass coatings, tint, or the dash finish. Knowing the right steps saves time and protects your vehicle. Whether you are upgrading your camera, moving it, or selling the car, clean removal matters.
Tools and materials you'll need
Prepare a few simple items before you try how to remove 3m dash cam mount. These tools keep the process safe and fast.
- Hair dryer or heat gun set to low
- Dental floss, fishing line, or thin nylon thread
- Plastic pry card or plastic scraper
- Isopropyl alcohol (70% or higher) or dedicated adhesive remover
- Microfiber cloths
- Rubbing alcohol wipes or mild glass cleaner
Step-by-step: how to remove 3m dash cam mount safely
Follow these short steps to remove a 3M dash cam mount with minimal effort. Keep each step slow and steady.
- Warm the adhesive
- Aim warm air at the mount base for 30 to 60 seconds.
- The heat softens the 3M adhesive.
- Do not use high heat or keep the heat source too close.
- Use dental floss or fishing line
- Slide floss or line behind the mount while pulling the mount away.
- Use a back-and-forth sawing motion.
- This method cuts the adhesive without stretching it.
- Pry gently if needed
- Insert a plastic card around the edge if floss does not move the mount.
- Work around the mount slowly.
- Never use metal tools that can scratch the glass.
- Clean the residue
- Apply isopropyl alcohol or an adhesive remover to the residue.
- Rub with a microfiber cloth until the residue lifts.
- Repeat until the surface is clean.
These steps answer how to remove 3m dash cam mount in a way that protects glass and wiring. Take your time. Rushing risks damage.
Methods explained: heat, floss, and adhesive remover
There are three reliable methods when you want to know how to remove 3m dash cam mount.
-
Heat method
- Heat loosens the adhesive bond.
- It is gentle when controlled and often enough for small mounts.
-
Floss or fishing line method
- Floss slices through the adhesive layer.
- It keeps pressure even and cuts cleanly.
-
Chemical adhesive remover
- Use alcohol or a safe adhesive remover.
- It dissolves residue but may take time for set adhesive.
Combine methods for stubborn mounts: warm first, then floss, then clean with alcohol. This layered approach shows how to remove 3m dash cam mount efficiently.
Cleaning residue and protecting your windshield
After you remove the mount, residue often remains. Clean it carefully to avoid streaks or damage.
- Soak the residue with isopropyl alcohol for a minute.
- Use a plastic scraper or cloth to wipe away softened adhesive.
- Finish with glass cleaner and a microfiber cloth.
- If tint or coatings are present, test the cleaner on a small area first.
If any sticky film persists, repeat the alcohol soak. This process finishes how to remove 3m dash cam mount without harming coatings.
Common problems and how to avoid damage
Anticipate these issues when you remove a 3M mount. Avoiding mistakes saves time.
-
Using metal tools
- Metal can scratch glass and dash surfaces.
- Use plastic cards or cloth-wrapped tools.
-
Excessive heat
- High heat can damage adhesives and coatings.
- Use low heat and keep distance.
-
Pulling too hard
- Sudden force can crack tempered glass or dislodge wiring.
- Use a gentle sawing motion with floss.
-
Harsh chemicals
- Solvents can harm tint or interior plastics.
- Stick to isopropyl alcohol or products marked safe for glass.
These tips help prevent common errors while trying to remove 3M mounts and show the safest way to remove a dash cam mount.
Personal experience and pro tips
I removed a 3M dash cam mount from my car during a road trip. I heated the base with a hair dryer and used fishing line to slice through the adhesive. The mount came off cleanly and the glass needed only a quick alcohol wipe. From that job I learned a few things:
- Always warm the adhesive first. It reduces effort and risk.
- Keep extra floss or line on hand; it frays and can snap.
- If you have rear-view mirror controls or sensors nearby, be extra careful with heat.
If you plan to reattach a mount, clean fully and use new 3M adhesive pads. Old adhesive makes repositioning messy. These practical notes reflect real use of how to remove 3m dash cam mount and reinstall if needed.
Frequently Asked Questions of how to remove 3m dash cam mount
Is heat safe for the windshield when removing a 3M mount?
Yes. Low, controlled heat from a hair dryer is safe. Avoid extreme heat or a directed heat gun close to glass.
Can I use fishing line instead of dental floss?
Yes. Fishing line is strong and slides well. Use a thin, non-coated line to avoid snags.
Will adhesive remover damage tint or coatings?
Some solvents can. Test a small, hidden area first and use isopropyl alcohol when unsure.
What if the mount does not budge after heating?
Try alternating heat and flossing. Apply a small amount of adhesive remover, then repeat the floss method.
How do I prepare the windshield for a new mount?
Clean all residue with alcohol, dry fully, and use the new 3M pad per the manufacturer’s instructions.
Conclusion
Removing a 3M dash cam mount is simple when you follow the right steps. Warm the adhesive, cut it with floss or fishing line, and clean the surface with isopropyl alcohol. Take your time, use plastic tools, and avoid strong solvents near coatings. Try these steps to remove and reinstall a mount with confidence. If this guide helped, leave a comment, share your experience, or subscribe for more practical car tech tips.