
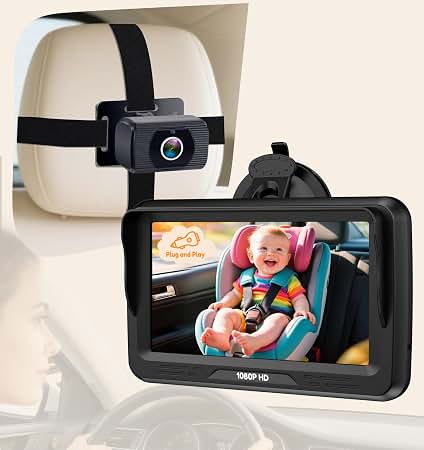
Install a car camcorder by mounting, hiding wires, and choosing safe power.
If you want clean, reliable video from your dash, you need more than a quick stick-on. This guide walks you through car camcorder installation with steps I use in real cars, every week. You will learn tools, wiring, mounting, and setup that keep your view clear and protect your car. By the end, you can do car camcorder installation like a pro, with less stress and better results.

What a Car Camcorder Is and Why It Matters
A car camcorder, often called a dash cam, records what happens on the road. It can save proof after a crash, capture hit-and-runs, and lower stress on trips. Many units also record when parked, using motion or impact events.
Good car camcorder installation is the key to clear video and long life. It keeps wires safe from airbags and heat. It also makes the system easy to use and hard to steal.
From years of installs, I have seen claims paid faster when video is solid and time-stamped. A tidy car camcorder installation helps with trust from insurers and peace of mind for you.
Tools and Prep Before You Start
Plan first. This makes car camcorder installation smooth and safe.
You will need:
- Plastic trim tools to lift panels without marks
- Microfiber cloth and alcohol wipe for glass prep
- Cable clips or adhesive mounts for tucking wire
- Add-a-circuit fuse taps and spare fuses
- Multimeter to test power and ground
- Zip ties for strain relief
- Optional hardwire kit with low-voltage cut-off
- MicroSD card that meets your cam specs
Pick your mounting spot. Place it behind the rearview mirror, near the dotted frit at the top of the glass. Check that wipers cover the lens area for a clear view in rain. Keep it out of any A-pillar airbag path to stay safe.
Do a quick bench test. Power the cam on a desk, format the card, and set date and time. This avoids guesswork later in the car.
Step-by-Step Front Camera Install
Clean, simple steps make car camcorder installation easy. Follow this flow.
- Prepare the windshield
- Clean the glass where the mount will stick.
- Let it dry. Warm the adhesive pad in cool weather.
- Mount the camera
- Sit in your usual seat height.
- Place the cam so the lens is just below the tint strip or frit.
- Level it with the road. Keep it hidden by the mirror from the driver’s view.
- Route the cable
- Run the USB cable from the cam across the headliner.
- Tuck down the A-pillar edge with a trim tool.
- Stay clear of the yellow airbag harness or airbag path. Let the cable sit between trim and seal, not behind the airbag.
- Bring wire to power
- Drop the cable behind the glove box or along the dash seam.
- Lead it to the fuse box or 12V socket, based on your plan.
This is the backbone of a clean car camcorder installation. Take your time with the wire path. It pays off every day you drive.
Power Options: 12V Plug vs Hardwire vs OBD-II
Power choice shapes how your car camcorder installation works day to day.
12V socket
- Fast and simple. Plug and go.
- Turns off with the key in most cars.
- Can be messy with a dangling wire.
Hardwire kit
- Best for parking mode and neat installs.
- Use an add-a-circuit to tap ACC and constant fuses.
- Choose a kit with low-voltage cut-off to protect your battery.
OBD-II adapter
- Easy to access, often supports ACC and parking modes.
- Leaves a plug out in the footwell area.
- Check cam and car support before you buy.
I prefer hardwire for a pro car camcorder installation. It feels OEM, hides wires, and supports parking mode. Use a fuse map and a multimeter to find safe taps.
How to Hardwire Safely
A careful hardwire makes parking mode stable and guards your battery.
Find the right fuses
- ACC fuse: on with key, off when parked.
- Constant fuse: stays on all the time.
- Ground: a clean metal bolt on the chassis.
Install the add-a-circuit taps
- Insert the original fuse in the lower slot.
- Add the cam’s fuse in the upper slot.
- Point the pigtail with the load side away from the supply side, so the cam is fused.
Connect and secure
- Crimp well and tug-test your joints.
- Use short, clean grounds on bare metal.
- Zip tie slack and avoid sharp edges or moving pedals.
Set the cut-off level
- Choose 12.0 V for short parking, 12.2–12.4 V for long park time.
- Test by leaving the car for a few hours and checking if the cam sleeps as set.
This step seals a safe, pro-grade car camcorder installation that will not drain your battery.
Clean Cable Routing and Airbag Safety
Your car camcorder installation should never fight airbags. Respect safety gear first.
Smart paths
- Headliner edge across the top of the screen.
- Down the A-pillar outside the airbag line.
- Behind the glove box or side panels to the fuse box.
Do nots
- Do not zip tie to airbag looms.
- Do not run tight bends near hot ducts.
- Do not pinch wires under sharp metal tabs.
Use cable clips in spots where trim is loose. Add a little service loop near the cam so the cable is not under stress. This prevents micro USB or USB-C port wear over time.
Rear Camera Install Like a Pro
Many kits include a rear cam. It adds key proof in a rear hit. Here is how to include it in your car camcorder installation.
Plan the path
- Start at the front cam. Follow the headliner to the C-pillar.
- Drop into the hatch or trunk area.
- Leave slack for the hatch to open and close.
Choose the mount
- Inside glass mount: easy and safe. Clean the glass and stick at top center.
- Exterior mount: use only if rated for outside use and weather. Seal cable entry points.
Avoid the defroster lines when cleaning and sticking. Aim level and centered. If the hatch wiring boot is tight, use wire lube and patience. I often tape the rear cable to a pull string and feed it through the boot in small moves.
Setup, Calibration, and Testing
The last part of car camcorder installation is setup. This is where you lock in great video.
Core settings
- Resolution and frame rate: 1080p 60fps or 1440p 30fps are solid picks.
- Bitrate: use high if your card is approved.
- Loop length: 1 or 3 minutes for easy file review.
- G-sensor: medium to avoid false locks.
- Parking mode: motion and impact, with sensitivity tuned for your spot.
Time sync and plates
- Set time zone and daylight savings.
- Aim so the hood line sits low in frame.
- Tap to focus, if your model allows. Read a plate two to three car lengths ahead in daylight.
Road test
- Drive over bumps and around turns.
- Check that rattles are gone and no codes appear.
- Play back sample files on a laptop. Listen for noise and look for glare.
This final check makes your car camcorder installation feel finished and pro.
Legal, Privacy, and Insurance Notes
Laws vary by state. Most allow dash cams if they do not block your view. Mount outside the driver’s clear view area. Check local rules on audio. Some places need consent before you record voices in the car.
Do not point the cam at a neighbor’s yard if you use parking mode at home. Keep plates and faces private when you post clips online. For insurance, keep clips short and keep your card healthy. A sound car camcorder installation helps you share clean proof fast.
Common Mistakes and Easy Fixes
Even careful people slip. Here are the top car camcorder installation errors I see and how to fix them.
Frequent mistakes
- Mounting in the wiper shadow leads to foggy video in rain.
- Routing behind an A-pillar airbag can block deployment.
- Using a cheap SD card causes file errors and gaps.
- Leaving the cable loose invites rattles and wear.
Fixes that work
- Reposition to a wiper-swept spot and re-aim.
- Reroute outside the airbag path using trim edges.
- Buy a high-endurance microSD rated for dash cams.
- Add clips and tie-downs every few inches where needed.
I learned to mark the glass with painter’s tape before peeling the adhesive. This locks the spot. It also gives me a reference line to keep the camera level. Small habits lead to a clean car camcorder installation every time.
Maintenance, Updates, and Data Care
A car camcorder installation is not set-and-forget. A few minutes each month keeps it sharp.
Upkeep list
- Clean the lens with a soft cloth.
- Format the SD card in-camera every month.
- Update firmware to get bug fixes and new features.
- Check cable strain and mounts after hot or cold snaps.
Data tips
- Save key clips to your phone or cloud after a trip.
- Keep an extra card in the glove box.
- Replace the card once or twice a year if you drive a lot.
These small steps keep your car camcorder installation fast, stable, and ready for the day you need it most.
Frequently Asked Questions
Where should I mount the front camera?
Place it high, behind the rearview mirror, in a wiper-swept area. Keep it out of your direct line of sight and clear of sensor housings.
Can I power the dash cam from the 12V socket?
Yes, it works well for basic use. For parking mode and a clean look, a hardwire kit is better.
Will a dash cam drain my battery when parked?
Not if you use a hardwire kit with low-voltage cut-off. Set the cut-off to 12.2–12.4 V for longer parks.
Do I need a special microSD card?
Use a high-endurance microSD card made for continuous video. It lasts longer and reduces file errors.
Is car camcorder installation safe to DIY?
Yes, if you follow airbag safety and use the right fuse taps. When unsure, get a pro to check your work.
Conclusion
A solid car camcorder installation blends clean mounting, safe wiring, and smart setup. Plan the route, respect airbags, choose the right power, and test your video. These small steps turn a simple gadget into real proof and peace of mind.
Grab a trim tool, a fuse tap, and a high-endurance card, and start today. If this guide helped, share it, subscribe for more how-tos, or leave a comment with your setup and results.