
Connect the dash cam to power, mount it on the windshield, and pair the app for settings.
I’ve installed and tested many dash cams, and this guide shows exactly how to connect dash cam systems step by step. You will learn simple wiring choices, app pairing, mounting tips, and troubleshooting advice based on real installs. Read on and you’ll be ready to connect your dash cam safely and reliably.

Why knowing how to connect dash cam matters
A dash cam records driving events and protects you after an accident. How to connect dash cam affects video quality, reliability, and whether recordings start automatically. A clean install avoids loose wires, drained batteries, and shaky footage. This section explains the key things to watch for when learning how to connect dash cam.
Types of dash cam power connections
There are four common ways to power a dash cam. Choose one based on skill, budget, and how long you want to record.
- Plug-in power (cigarette lighter): Plug the camera into the 12V socket. This is the easiest way to connect dash cam power.
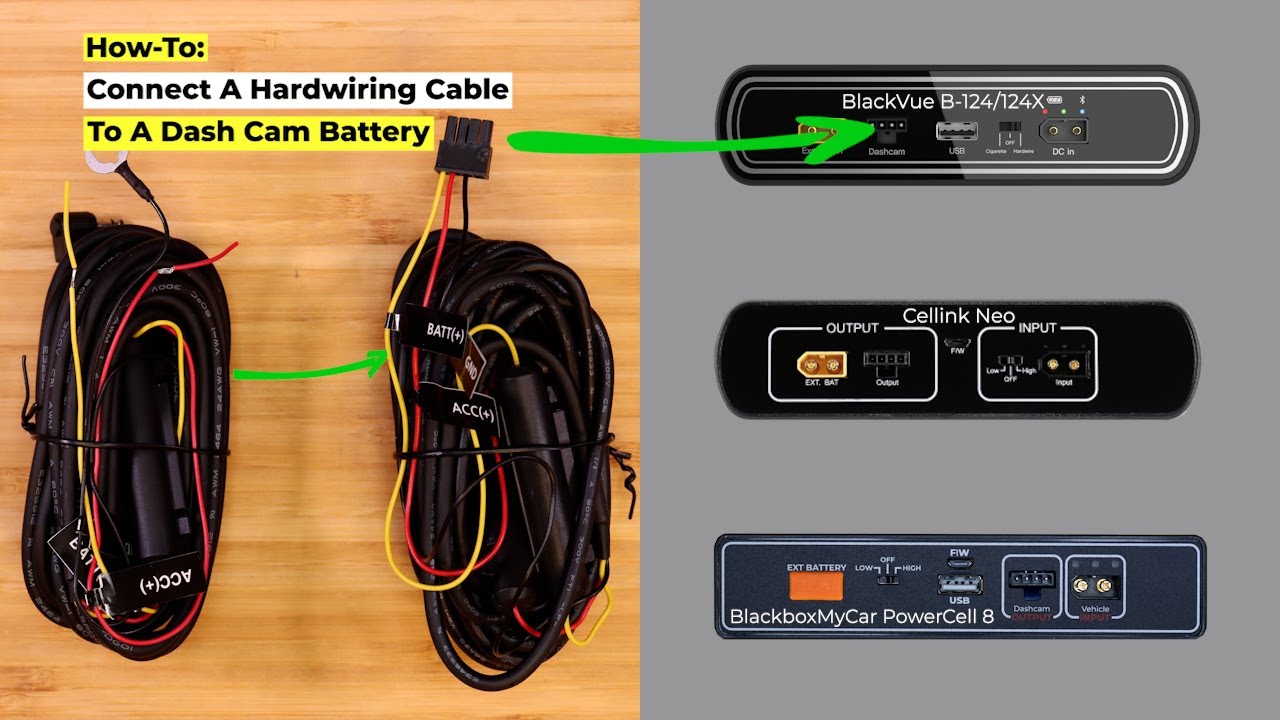
- Hardwire kit (fuse box): Connect the camera to vehicle fuse power for a neat, permanent install. This lets the dash cam run with ignition or run on parking mode.
- Battery pack or power bank: Use an external battery to avoid draining the car battery. This is good for parking recording.
- Internal car battery (professional install): Some installers tap the main car battery for high-duty setups. This is for advanced users only.
Each option changes how you connect dash cam and whether parking mode works without modification.
Tools and materials you’ll need
Gather the right tools before you start. A quick prep saves time and makes the install clean.
- Dash cam unit, mount, and power cable
- MicroSD card sized to the camera’s spec
- Fuse tap kit for hardwiring (if you choose hardwire)
- Trim panel tool or flat pry tool for hiding cables
- Multimeter to find fused circuits and test voltage
- Zip ties and adhesive tape to secure wires
- Owner manual for your vehicle and dash cam
Having these items ready simplifies the steps to connect dash cam.
Step-by-step: how to connect dash cam using a cigarette lighter
This method is the fastest and requires no wiring. It’s ideal for renters or quick installs.
- Plug the dash cam power cable into the camera.
- Mount the camera on the windshield near the rearview mirror.
- Route the cable along the headliner and down the A-pillar. Use trim tools to tuck the wire behind panels.
- Plug the cable into the 12V socket or cigarette lighter.
- Turn the ignition on to confirm the dash cam powers up and records.
This simple method teaches the basics of how to connect dash cam power without opening fuse panels.
Step-by-step: how to connect dash cam using a hardwire kit
Hardwiring gives a neat install and can enable parking mode. If you are not comfortable, get a professional to hardwire.
- Park the car, disconnect the negative battery terminal, and keep safety in mind.
- Open the fuse box and locate an accessory fuse that turns on with ignition and a constant fuse if needed.
- Attach the fuse tap wiring: red to accessory fuse (switched), yellow to constant fuse (for parking mode), and black to a good ground point.
- Route the hardwire cable along the headliner and A-pillar. Avoid airbags and moving parts.
- Reconnect the battery, start the car, and test the dash cam. Check that it powers with ignition and that parking mode activates when the car is off.
Hardwiring requires care, but it is one of the most professional ways to connect dash cam.
How to connect dash cam to Wi-Fi and pair the app
Many modern dash cams offer Wi-Fi to change settings and download video. Pairing is quick.
- Download the camera’s app on your phone.
- Turn on the dash cam and enable Wi-Fi in the camera menu.
- Open your phone Wi-Fi settings and connect to the dash cam network. Enter the default password shown on the camera or in the manual.
- Open the app and follow the app’s pairing steps to view live video, change resolution, and download clips.
Connecting Wi-Fi helps you manage files and check the camera after you connect dash cam physically.
Mounting tips for steady, clear footage
Where and how you mount the camera affects video quality and legal compliance.
- Place the camera behind the rearview mirror to minimize visual obstruction.
- Clean the windshield before attaching the adhesive or suction mount.
- Align the camera so the horizon is level and the road center is in frame.
- Avoid blocking sensors, airbags, or driver view to stay legal.
Good mounting completes the job after you learn how to connect dash cam power and software.
Testing and troubleshooting after you connect dash cam
Confirm the camera works and solve common issues quickly.
- Test power: Start the car and make sure the camera boots and records.
- Check loop recording and time stamps: Review a short clip to confirm settings.
- No power: Test the 12V socket with a multimeter and try a different fuse or ground.
- Wi-Fi not connecting: Restart the camera and phone, and confirm the password.
- Overheating or battery drain: Use a hardwire kit with a low-voltage cut-off or use an external battery pack.
These steps help you fix typical problems after you connect dash cam.
Legal and safety considerations when you connect dash cam
Laws vary by region. Follow these rules for safe, lawful installs.
- Mount so the dash cam does not block the windshield view. Many states limit obstruction.
- Respect privacy: Avoid recording private areas or people without consent where prohibited.
- Use a secure mount to prevent the camera from becoming a hazard in a crash.
- Check local laws for audio recording restrictions before enabling sound.
Keeping laws and safety in mind is part of responsible guidance on how to connect dash cam.
My hands-on experience and lessons learned
I’ve installed dash cams in sedans, trucks, and rentals. Here are practical insights I learned.
- Always route wires away from airbags. One slip can trigger replacement costs.
- Use a fuse tap for a clean look and to preserve the vehicle’s warranty. I once left a plug-in cable dangling and it drained a car battery overnight.
- Test recordings on a short drive before trusting the camera for long trips. Fix angle or settings early.
- Keep the microSD card health-checked. Cards fail; replace every 1–2 years for reliability.
These tips come from real installs and help you connect dash cam with fewer mistakes.
Best practices and advanced tips
Follow these habits for the best dash cam performance.
- Use a high-quality, speed-rated microSD card and format it in the camera.
- Set date and time accurately to keep evidence valid.
- Update firmware when available to fix bugs and add features.
- Label the fuse tap or keep a wiring note to help future maintenance.
- Consider a dual-channel dash cam for front and rear coverage.
Adopting these practices improves longevity after you connect dash cam.
Frequently Asked Questions of how to connect dash cam
How do I hide the dash cam wires for a clean install?
Tuck the wires under the headliner and down the A-pillar, using a trim tool to avoid damage. Secure loose cables with zip ties to prevent rattles.
Will the dash cam drain my car battery if I hardwire it?
A proper hardwire with a low-voltage cutoff prevents battery drain, and many kits include this safety feature. If not configured, parking mode can slowly drain the battery.
Can I install a dash cam myself or do I need a professional?
Many users can do a plug-in or simple hardwire with basic tools and a manual. For complex wiring or modern vehicles, a professional install reduces risk.
How do I pair my dash cam to my phone app?
Enable Wi-Fi on the camera, connect your phone to the camera’s Wi-Fi network, and complete pairing in the app. Follow the on-screen steps to access live view and settings.
What microSD card should I use for my dash cam?
Choose a high-endurance microSD card with the recommended capacity and speed class for your camera. Format the card in the dash cam for best compatibility.
Conclusion
You now have a clear, step-by-step path for how to connect dash cam using plug-in, hardwire, battery, or Wi-Fi methods. Start by picking the power method that fits your needs, gather tools, and follow safe wiring and mounting steps. Test recordings and update settings for reliable evidence and peace of mind. Try an install on a short drive, and if you want a neat, permanent setup, consider a professional hardwire job. If this guide helped, subscribe for more gear and how-to tips, or leave a comment about your dash cam setup.