
Installing a rear view camera boosts safety when fitted, wired, and aimed right.
If you want a clean, safe, and pro-grade rear view camera fitting, you’re in the right place. I’ve installed hundreds across sedans, SUVs, trucks, and RVs. In this guide, I break down choices, tools, steps, and fixes. You will learn how to plan, wire, aim, and test a system that works every day.

Understanding rear view camera fitting and why it matters
Rear view camera fitting is the process of mounting, wiring, and setting up a backup camera so it turns on in reverse and shows a clear view behind your car. A good fit cuts blind spots and helps you park with calm. It can also stop backing bumps and save your bumper.
US safety rules now make backup cams standard on new cars. Crash data shows these cameras help cut back-over crashes and help with child safety. A solid rear view camera fitting brings that same peace of mind to older cars too.
Rear view camera fitting is not only about parts. It is about plan, power, path, and aim. Do that well, and you get a sharp, stable image when it counts.
Types of rear view cameras and displays
There are many camera types. Pick the one that suits your car and your skill.
- License plate frame cameras look tidy and are easy to fit. Good for mild weather.
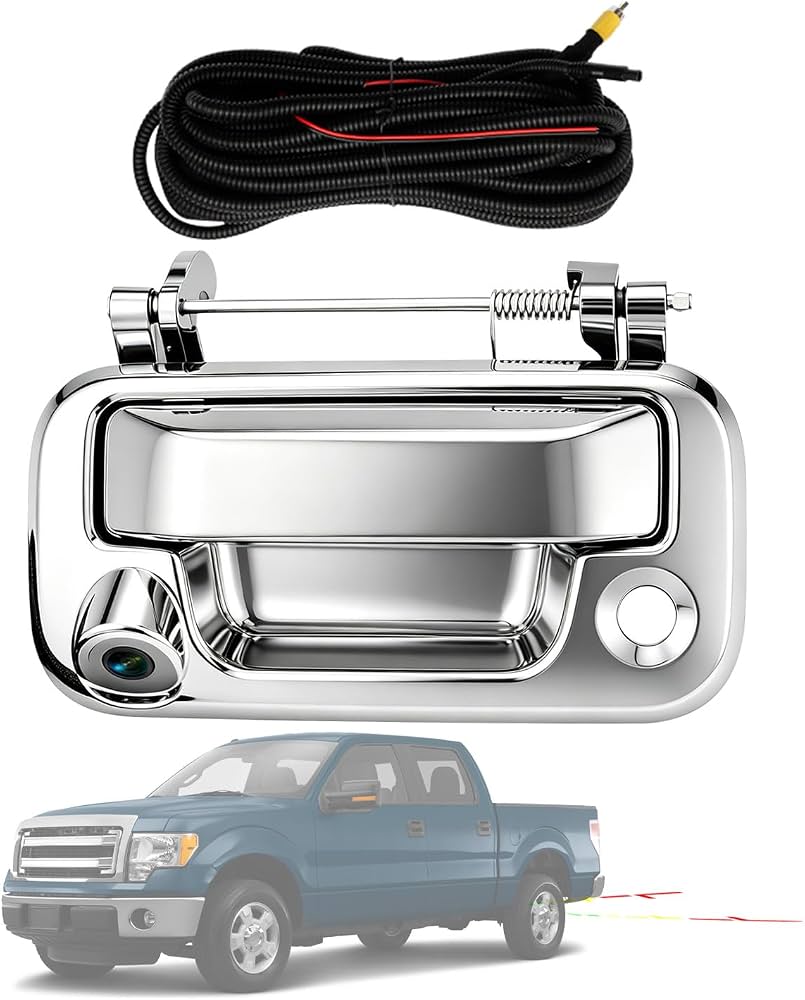
- Trunk handle or OEM-style cameras replace a trim piece. They look stock and seal well.
- Surface mount cameras bolt to metal or plastic. They work on trucks and vans.
- Flush mount cameras sit in a small hole. They look clean but need drilling.
- Wireless kits send video by radio. Less wire runs, but may lag or drop in noise.
Displays also vary.
- Factory screen integration uses the car’s radio screen. Best look, needs an interface.
- Aftermarket head units add Apple CarPlay or Android Auto with a camera input.
- Clip-on or dash screens are fast to add, great for older cars.
- Mirror monitors replace or clip over the rear view mirror.
Rear view camera fitting should match your climate, car trim, and budget. Think about day and night use, wash cycles, and road salt.
Tools, parts, and prep checklist
Have your gear ready before you start. It makes rear view camera fitting fast and neat.
- Trim tools to lift panels with no marks
- Drill, step bit, and grommet for clean holes
- Multimeter to test power and ground
- Wire fish tape to pull cables through trim
- Soldering iron or crimp tool and heat shrink
- Electrical tape, zip ties, and split loom
- Fuse tap or add-a-circuit and a 3–5A fuse
- Camera, video cable or transmitter, display or interface module
Prep steps:
- Note where you will mount the cam. Check plate lights, hatch seams, and trunk lid.
- Plan the wire path to avoid airbags, hinges, and sharp edges.
- Find a good ground and a reverse light power wire with the multimeter.
- Take before photos of panel clips and screw spots.
Rear view camera fitting goes smoother when you map your route on paper first.
Step-by-step rear view camera fitting (DIY)
Follow these steps for a clean install. Take your time. Clean work lasts.
-
Mount the camera
- Test fit and mark holes. Use painter’s tape to avoid chips.
- Drill if needed. Deburr, paint edges, and add a grommet to seal.
- Bolt or clip the cam. Aim it level. Tighten hardware.
-
Run the video and power cables
- Feed the cable through the trunk or hatch boot.
- Tuck along factory looms. Zip tie every few inches.
- Avoid moving hinges and hot exhaust paths.
-
Connect power and ground
- Use a multimeter to find the reverse light wire. It should read 12V only in reverse.
- Splice with solder and heat shrink, or use a quality crimp.
- Ground to bare metal with a ring terminal and star washer.
-
Hook up the display
- RCA video to the screen’s camera input (often yellow).
- Trigger wire from reverse 12V to the screen’s reverse input.
- If using a head unit, set the camera input to On in settings.
-
Test before closing trim
- Key on, shift to R with the brake held. Check image and lines.
- Wiggle harness gently to find weak spots.
- Fix, then reassemble trim.
Rear view camera fitting is easier if you bench test the kit on a 12V tool battery first. You can confirm the camera works before you touch the car.
Power, wiring, and signal options explained
There are two common power plans.
- Reverse-only power: Tap the reverse light for camera power and trigger. The cam turns on only in R. Simple and safe.
- Accessory power with relay: Power the cam from ACC with a fuse, and use the reverse wire as a trigger. The cam can show on demand if your screen allows it.
Video signals:
- Analog composite over RCA is the norm. It is simple and works on most screens.
- AHD/HD-TVI cams need a matching HD monitor. Check the spec.
- Wireless 2.4 GHz kits avoid long runs but can have noise. Use a known brand.
Ground rules:
- Keep grounds short on bare metal.
- Do not share grounds with high-load devices like fuel pumps.
- Use loom and grommets to protect wires at pass-throughs.
Good wiring is the heart of rear view camera fitting. Neat runs stop hum, flicker, and dropouts.
Calibration, aiming, and testing
A clear view is not enough. The aim must be right.
- Height: Most cars work well with the lens at 20–30 inches high.
- Level: Use a small bubble level on the trim near the cam.
- Angle: Tilt so you see your bumper edge at the bottom of the screen.
Parking lines:
- Static lines come from the cam. You can often turn them off with a white loop wire.
- Dynamic lines come from the head unit or CAN module. They move with the wheel.
Testing steps:
- Check day, dusk, and night. Use a wet road test to spot glare.
- Spray the lens and wipe to confirm water beads off.
- Check for radio noise with the engine on and off.
Rear view camera fitting is not done until you test with real parking moves in your own driveway.
Integration with head units and smartphones
Factory screens look best. Many cars need an interface that speaks to the CAN bus. It adds the camera input and a reverse trigger. Some modules also add dynamic lines.
Aftermarket head units make rear view camera fitting simple. Most have a CAM-IN RCA and a purple-white reverse trigger lead. Turn the camera feature on in the menu and set the polarity to battery.
Phone integration:
- CarPlay and Android Auto do not carry video from the cam. The head unit handles that.
- Some dash apps let you switch the cam on while moving, if wired to ACC and a switch.
A pro tip: If the image is black and white or rolls, check the video format. Set the unit to NTSC. Most US kits use NTSC.
Common mistakes and troubleshooting
I see the same errors often. You can avoid them.
- Power from a dim line: LED tail lights may not give clean 12V. Use a relay or grab power from the fuse box.
- Ground on paint: Scrape to bare metal. Use a star washer.
- Aim too low: You see only your bumper. Re-aim so the horizon sits in the top third.
- Loose RCA: Tape or clip the joint so it does not pull out.
- Wireless lag: If shifts feel slow to show, switch to wired.
Quick fixes:
- Flicker in reverse: Add a filter or relay. Many modern cars pulse the reverse line.
- Static lines off: Cut or join the cam loop wire as marked on the harness.
- No image but a blue screen: Trigger is missing. Check the reverse lead at the screen.
Clean, tight wiring is the best cure in rear view camera fitting.
Legal, safety, and warranty notes
Know your local rules. In the US, new cars must have a rear camera. For older cars, it is legal to add one. Do not block the plate or lights.
Mind airbags. Do not route wires near yellow airbag looms. Avoid pillar spots with side curtain airbags.
Warranty tips:
- Use add-a-fuse taps. Do not cut factory looms if you can avoid it.
- Keep photos of steps. If you sell the car, the next owner will thank you.
Rear view camera fitting should improve safety, not risk it. Take care with routing and seals.
Costs, time, and who should install
Expect a DIY kit to cost 50–250 dollars. Pro installs run 150–500 dollars for labor, more with a CAN interface or head unit.
Time:
- Simple plate cam to clip-on screen: 1–2 hours.
- OEM-style cam to factory screen with interface: 3–5 hours.
- Truck or RV long runs: Add 1–2 hours.
Choose DIY if you like tools and can read a wiring diagram. Choose a pro if your car has complex trim or you want factory-level integration. A pro-grade rear view camera fitting pays back in less stress each time you park.
Care, maintenance, and upgrades
Clean the lens when you fuel up. Road dust and salt blur the view fast. A dab of rain repellent on the lens can help.
Check cable strain at the hatch boot each oil change. Look for cracked wires. Seal any slow leaks at grommets before they grow.
Upgrades to consider:
- Swap to a Sony sensor cam for better night vision.
- Add a second camera for trailers or cargo.
- Add a DVR that records the rear feed.
Small upkeep keeps your rear view camera fitting sharp and safe for years.
Real-world examples and tips from the field
A client with a minivan had a foggy night view. The fix was a better sensor and a slight aim up. It cut glare from wet roads and gave crisp lines.
A pickup owner had static each time he shifted. We found a weak ground on painted metal. A clean ground and a relay cured the flicker.
My best tip for rear view camera fitting: bench test first. I use a 12V drill battery to power the cam and screen at my bench. That way, if the car side has a fault, I know the kit is good.
Another lesson: label both ends of each wire. When the trunk is open and you have panels off, it is easy to lose track. Labels save time and keep errors low.
Frequently Asked Questions of rear view camera fitting
Can I install a rear camera without removing interior panels?
Yes, but it is harder to hide wires. You will get a better, cleaner rear view camera fitting if you pop a few panels with trim tools.
Do I need a relay for LED reverse lights?
Often yes. Many LED circuits are pulsed and can cause flicker. A relay or filter gives the camera a steady 12V.
Will a wireless kit work on an SUV or RV?
It can, but range and noise vary. For long vehicles, a wired rear view camera fitting gives the most stable image.
How do I know if my screen is NTSC or PAL?
Most US screens use NTSC. If the picture rolls or is black and white, change the video setting or get a matching camera.
Can I keep the camera on while driving forward?
Yes, with ACC power and a manual switch or a head unit that supports it. Check local laws and use it with care.
Do dynamic parking lines need a special camera?
They need a head unit or interface that reads steering angle. Many cameras only output static lines; the system overlays the dynamic lines.
What field of view is best?
Around 150–170 degrees works well for most cars. Too wide can distort distance; too narrow can hide cross traffic.
Why is my image blurry at night?
It could be a weak sensor, a dirty lens, or glare from plate LEDs. Clean the lens and consider a camera with a better sensor and WDR.
Can I power the camera from the head unit?
Some units supply power, but current may be low. For a reliable rear view camera fitting, use a fused 12V feed and the reverse trigger.
Will the camera drain my battery?
Not if wired to reverse or ACC correctly. A camera wired to constant power can drain the battery over time.
Conclusion
Rear view camera fitting is a smart upgrade that blends safety, comfort, and value. Plan your mount, route wires with care, make clean power and ground, then aim and test. Do these steps well and your camera will work each time you need it.
If you feel ready, gather your tools and start with a bench test today. Want more help? Subscribe for new guides, or drop a comment with your car model and goals so I can suggest a custom plan.