
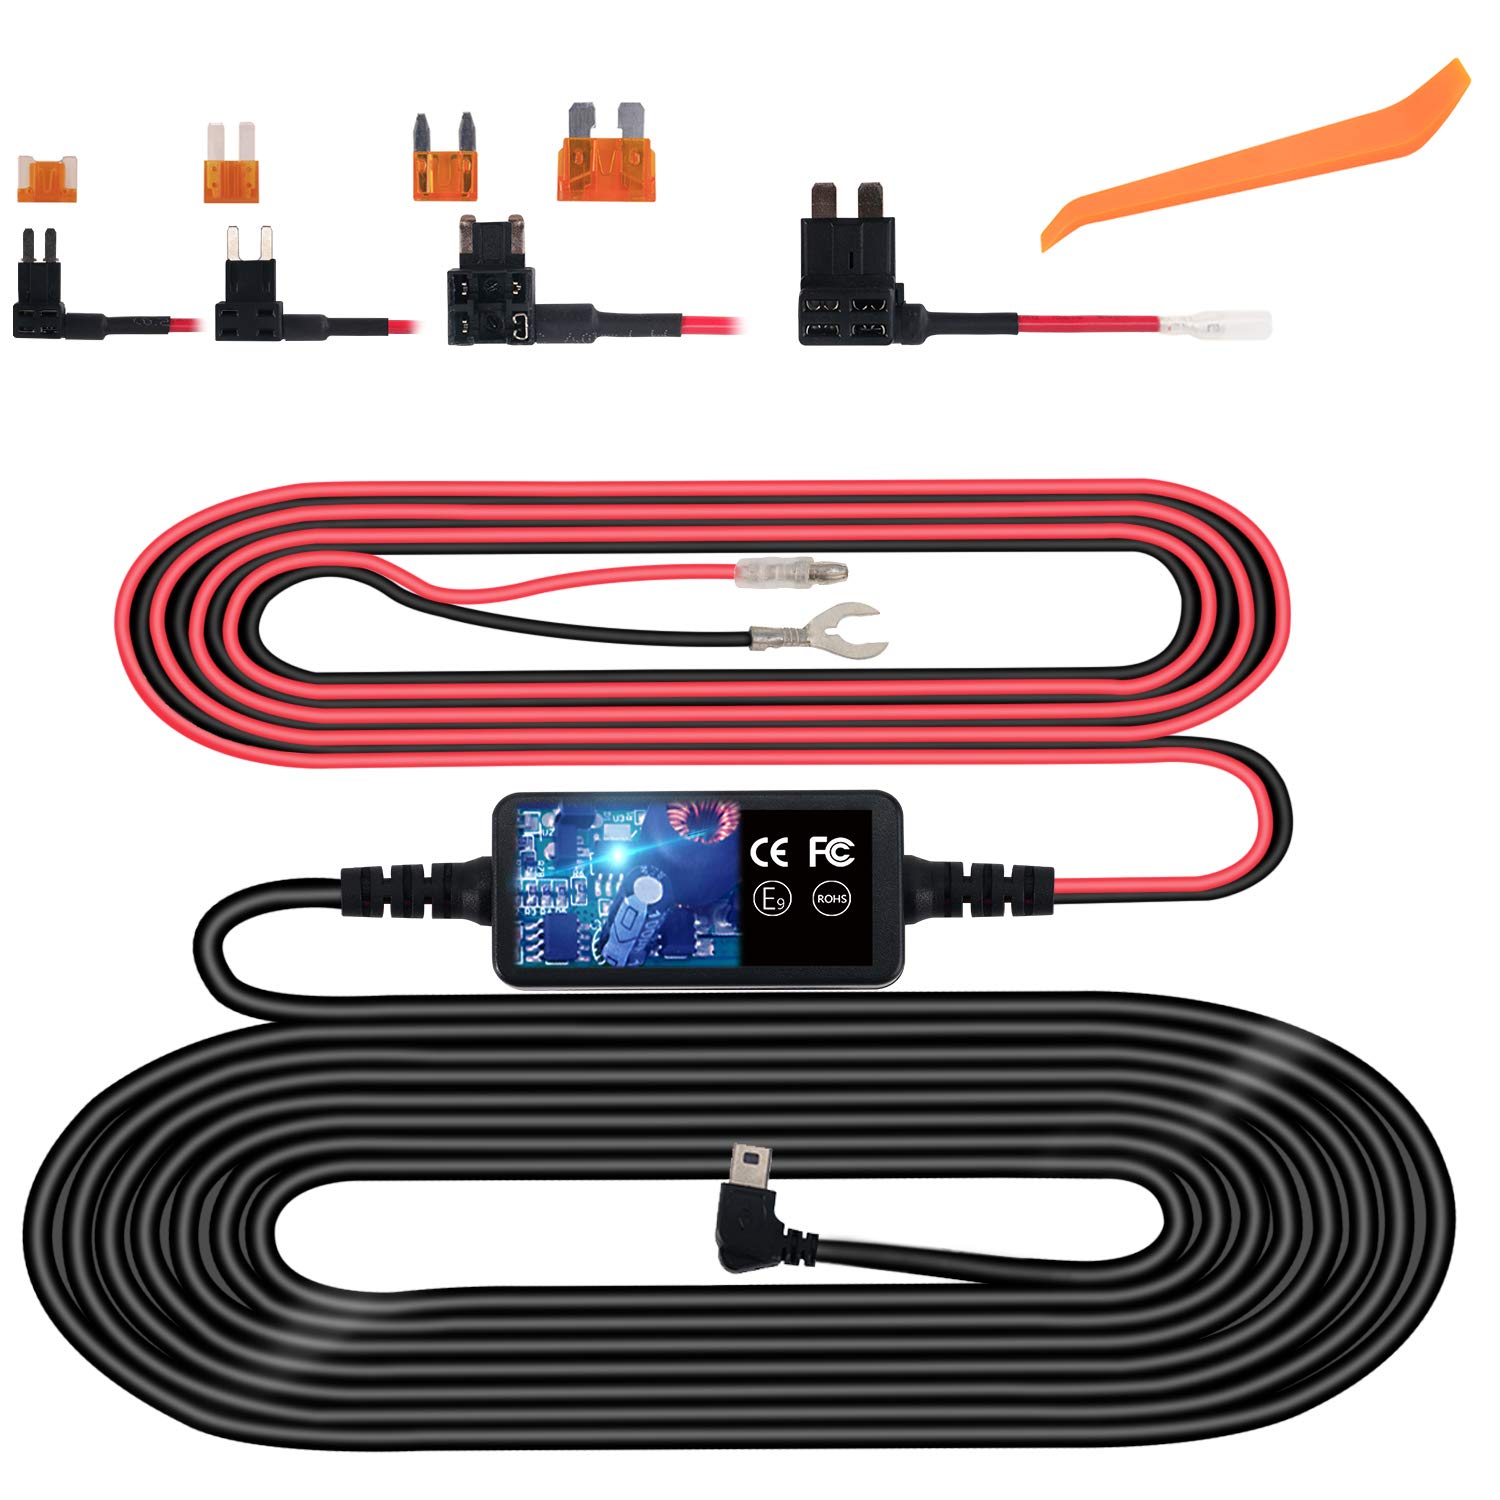
A hardwire kit for dashcam powers your camera safely, cleanly, even while parked.
If you want round-the-clock coverage and a tidy install, a hardwire kit for dashcam is the upgrade that changes the game. I install and test dash cams for a living. This guide breaks down how the kit works, what to buy, and how to install it right the first time.

What is a hardwire kit for dashcam? And why it matters
A hardwire kit for dashcam is a small power module and cable set. It taps your car’s fuse box for power. It gives your dash cam stable 5V power and adds battery protection. It also supports parking mode so the cam can record when the car is off.
The kit has three main parts. There is a DC-to-DC converter that drops 12V or 24V to 5V. There are fuse taps to connect to your car fuses. There is a ground wire that ties into bare metal. Many kits add a low-voltage cut-off. This keeps your 12V battery safe.
Why it matters is simple. A plug-in cable uses the cigarette lighter. That outlet may turn off with the key. It can be messy and can come loose. A hardwire kit for dashcam hides the cable and frees the socket. It boosts safety, uptime, and neat looks.
How a hardwire kit for dashcam works (in simple terms)
Most kits use three wires. ACC is the red wire. It gets power only when the key is on. B+ is the yellow wire. It is a constant power source. GND is the black wire. It goes to clean metal on the car body.
The module senses these feeds. When ACC is on, the dash cam runs in drive mode. When the key is off, the module keeps the cam on in park mode. If the car battery falls to a set level, the module cuts power. That saves your battery.
Power leaves the module as USB-C, micro-USB, or a small barrel plug. The module keeps voltage clean and steady. Good kits filter noise so your radio stays clear.
Choosing the right hardwire kit for dashcam
Pick a kit that matches your dash cam plug type. USB-C is common now. Older cams may use micro-USB or a barrel plug. Check the cam’s power input and current needs.
Look for key features:
- Low-voltage cut-off with set points like 12.4V, 12.2V, 12.0V, and 11.8V for 12V cars. For trucks, 24V cut-offs help too.
- Timer settings for parking mode. Common options are 6, 12, or 24 hours.
- Fuse tap types that match your car. Mini, low-profile mini, micro2, and ATO/ATC are the big four. Use the right one.
- Enough cable length for a clean A-pillar run to the fuse box.
- Heat tolerance. Good kits rate well above 140°F. Car cabins get hot.
If your dash cam brand sells an OEM kit, start there. It will match the cam’s power draw and parking features. If you drive an EV or a start-stop car, pick a kit with stable cut-offs. Some cars dip voltage at idle. A stable kit avoids random shut-offs.
installation guide (DIY-friendly)”
style=”max-width: 100%; height: auto; border: 2px solid black; border-radius: 10px; display: block; margin: 0 auto;”
loading=”lazy”
/>
Step-by-step installation guide (DIY-friendly)
You can do this in under an hour if you plan well. Here is a simple path I use in the shop.
Tools I like:
- Plastic trim tools, not metal screwdrivers.
- A test light or a basic multimeter.
- Add-a-circuit fuse taps and the right size fuses.
- Crimp tool, zip ties, and alcohol wipes.
Steps:
- Plan your cable path. Tuck the wire under the headliner. Run down the A-pillar away from the airbag. Use the door seal gap to hide the wire.
- Find the fuse box. Use the car manual. Pick one ACC fuse like the radio or wipers. Pick one constant fuse like the dome light or hazard lights.
- Test the fuses. ACC should turn off with the key. Constant should stay live.
- Install the add-a-fuse taps. Mind the “hot” and “load” sides. The add-a-fuse must feed the circuit from the hot side. The new fuse for the tap should match the dash cam draw. The old fuse value stays for the car circuit.
- Ground the kit to bare metal. Use a factory bolt. Sand paint if needed. Tighten well.
- Set your low-voltage cut-off and timer on the module.
- Mount the dash cam behind the mirror. Clean the glass first. Avoid blocking sensors or the driver’s view.
- Zip tie slack. Keep wires away from pedals and hinges.
- Test. Key on. Cam should power up. Key off. Parking mode should start. Shake the car or walk near it if you use motion detect, and check for an event clip.
Safety notes:
- Never tap airbag, ABS, or power steering fuses.
- Do not route wires over airbag covers.
- If you feel stuck, get a pro. It costs less than a blown module or a dead battery.
A hardwire kit for dashcam is simple once you learn the plan. Take your time and label your fuses.
Parking mode and battery protection settings
Parking mode is the main reason to use a hardwire kit for dashcam. Most cams offer impact-only, motion detect, or time-lapse. Impact-only uses a G-sensor to save space. Motion detect can create many clips in busy areas. Time-lapse records slow but keeps a full view.
Mind your battery. Here is a quick rule. A one-channel cam draws about 2–3W. A two-channel cam draws about 4–6W. At 12V, 5W is about 0.42A. A 60Ah battery can run that draw for many hours, but you should not drain it low. This is why the cut-off is key.
Tips I use in real cars:
- In hot lots, use impact-only or a short timer. Heat kills batteries and SD cards.
- If the car sits for days, raise the cut-off to 12.2V or set a short timer.
- Park near light. Motion detect works best with good light and contrast.
Common mistakes and troubleshooting a hardwire kit for dashcam
If the cam will not go into parking mode, check the fuse picks. Many times ACC and B+ are swapped. Use a meter to confirm. Make sure the add-a-fuse is in the right slot of the tap.
If the cam reboots at stops, your start-stop system may drop voltage. Raise the cut-off or use a kit known to ride through short dips. A better ground can also fix random resets.
If you hear radio noise, move the ground to a cleaner point. Route the cable away from the antenna lead. A snap-on ferrite core near the module can help.
No power at all? Check for a blown fuse in the add-a-circuit. Confirm the fuse tap size. Micro2 taps look like mini taps at a glance. They are not the same.
In EVs, the 12V battery is small. Parking mode can trip the cut-off fast. Set a higher cut-off or shorter timer. A hardwire kit for dashcam still helps keep the socket free and the wiring tidy.
Cost, value, and warranties
A good hardwire kit for dashcam costs around 15 to 50 dollars. Pro install often runs 100 to 200 dollars. The value shows the first time it captures a hit-and-run or a door ding.
Worried about your car warranty? A clean add-a-fuse install does not cut factory wires. It is a reversible mod. In the US, warranty law says a maker must prove the mod caused the fault. Use proper fuses and neat work to stay safe.
Legal, privacy, and safety notes
Laws on dash cams vary. Some states limit where you can stick items on the glass. Some have rules for audio. Check local law before you mount or record.
Do not block sensors or airbags. Keep wires clear of pedals and seat tracks. Hide the module so it will not become a projectile in a crash. A hardwire kit for dashcam is safe when mounted and fused with care.
Real-world examples and pro tips
A client came in after a parking lot hit. The other driver left. The cam caught the tag and the full nudge in buffered parking mode. The insurer paid out fast. That result needed a hardwire kit for dashcam and a smart parking setup.
I once set a low cut-off at 11.8V on a car that sat all week. The owner came back with a slow crank. We raised the cut-off to 12.2V and cut the timer to 6 hours. No more issues.
Pro tips you can use today:
- Map your fuse box with a meter. Make a note of ACC and constant fuses.
- Face the add-a-fuse the right way. Hot side feeds the fuse leg that is not tied to the circuit.
- Leave a small service loop at the cam. You can swap SD cards with ease.
- Keep spare fuses in the glovebox. Label the tap with painter’s tape.
Frequently Asked Questions of hardwire kit for dashcam
Do I need a hardwire kit for dashcam if my outlet is always on?
You can use the outlet, but the kit adds battery cut-off and cleaner wiring. It also supports full parking mode with better safety.
Will a hardwire kit for dashcam drain my battery?
Not if set right. Use the low-voltage cut-off and timer so the cam shuts down before the battery gets low.
Which fuse should I tap for ACC and constant power?
Use an ACC fuse like radio or wipers. Use a constant fuse like dome light. Avoid airbag, ABS, and power steering fuses.
Can I install a hardwire kit for dashcam myself?
Yes, with basic tools and care. If you feel unsure, a pro installer can do it in under an hour.
Is a separate battery pack better than a hardwire kit for dashcam?
A battery pack can power parking mode longer and protect the car battery. It costs more and takes more space, but it is great for long parking sessions.
Does a hardwire kit for dashcam work in EVs and hybrids?
Yes, but the 12V battery is small. Set a higher cut-off or shorter timer to avoid deep discharge.
Conclusion
A hardwire kit for dashcam gives you a clean install, true parking mode, and real battery protection. It keeps your cam ready when it matters most and turns a simple camera into a round-the-clock guardian.
Pick the right kit, follow safe fuse picks, and test your setup. Start with a higher cut-off and fine-tune from there. Ready to level up your dash cam? Try the steps above, and share your results or questions in the comments.