
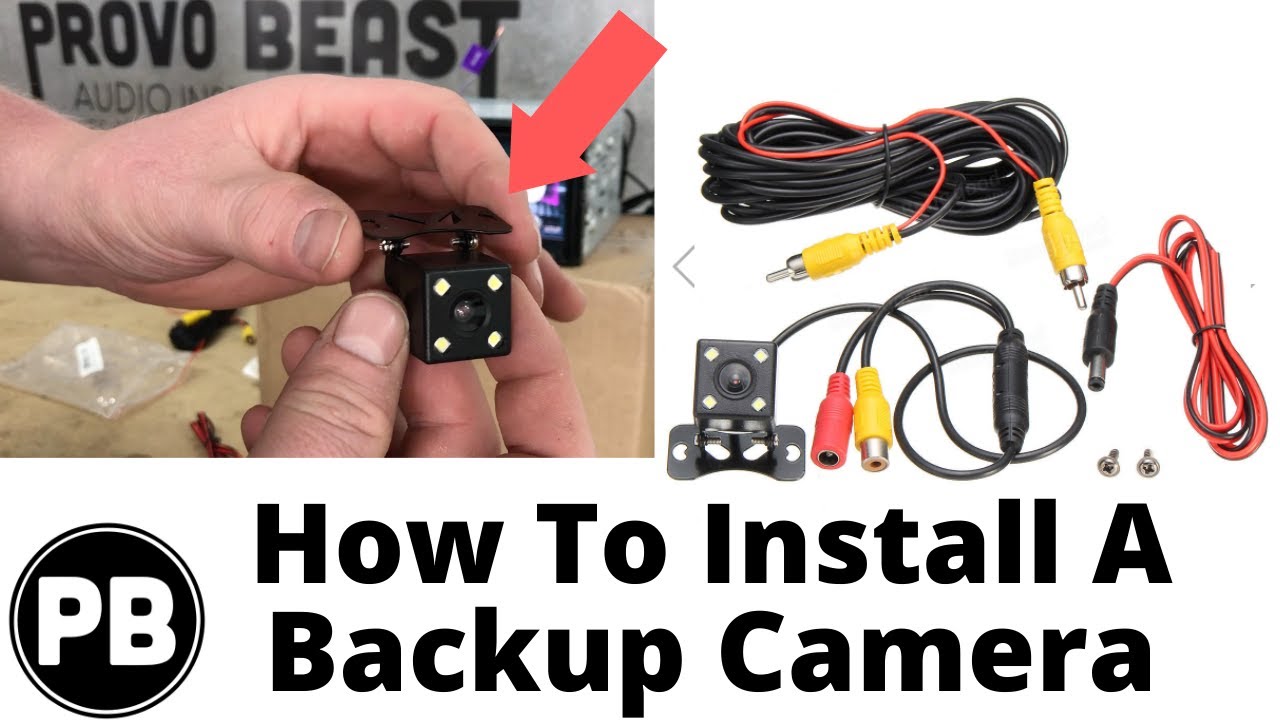
Mount the camera, power it from the reverse light, and connect it to your display.
If you want a fast, safe boost to parking confidence, fitting rear view camera to car is one of the best upgrades you can make. I’ve installed many systems in daily drivers, trucks, and classics. In this guide, I’ll share the exact steps, smart tips, and real mistakes to avoid when fitting rear view camera to car so you can finish the job right the first time.

Why add a rear view camera to your car
Backing up should not feel like a leap of faith. A camera helps you see low hazards, pets, and curbs that mirrors miss. It also makes parallel parking and trailer hookups quick and calm. If you tow, a clear rear view can save time on every trip. When fitting rear view camera to car, you gain safety, speed, and peace of mind.
There are limits. Cheap sensors struggle at night. Dirty lenses blur the view. Sun glare can wash the screen. A good setup and clean lens fix most of this. I’ve seen drivers cut their parking dings to zero with a solid camera and a quick wipe before leaving.
Choose the right rear view system
Picking the right kit makes the install smooth. When fitting rear view camera to car, start with the layout that fits your car and skills.
Common camera styles:
- License plate mount Easy to add with small tools. Sits high and centered.
- Trunk handle or tailgate replacement Clean look. Often model-specific.
- Bumper flush mount Low and wide view. Needs drilling and careful aim.
Connection options:
- Wired Best image and stable signal. Needs careful cable routing.
- Wireless Easy routing. Watch for 2.4 GHz interference and power noise.
Display choices:
- Mirror monitor Clips over the factory mirror. Clean and simple.
- Head unit screen Uses a dash touchscreen with a reverse trigger wire.
- Standalone dash monitor Stick-on screen. Flexible but visible.
Image and format notes:
- Standard definition CVBS/NTSC works with most screens. Fine for daily use.
- HD analog AHD/TVI cameras are sharper but need a matching monitor.
- Field of view 120–170 degrees. Wider is not always better; ultra-wide can distort.
Power notes:
- Most cameras want 12 V and draw low current.
- Some factory radios feed 6 V to the camera. Check your manual if you are adding to OEM gear.
Source: youtube.com
Plan the job and gather tools
A clear plan saves time and avoids trim damage. When fitting rear view camera to car, map the cable path from the rear to the screen. Use the factory loom when you can. Avoid sharp edges and airbag zones.
Tools and materials:
- Trim tools and small screwdrivers For clean panel removal.
- Multimeter For finding the true reverse wire and good ground.
- Fish tape or pull cord For running cable through tight spots.
- Electrical tape, heat-shrink, zip ties For safe, tidy wiring.
- Ring terminals, T-taps or solder sleeves For strong joins.
- Rubber grommets and sealant For any new holes.
- Inline fuse or fuse tap For clean power adds.
- Park on a level spot. Set the brake.
- Disconnect the negative battery terminal before wiring.
- Wear eye protection when drilling or working under trim.
Source: amazon.com
Step-by-step: install and wire the camera
Here is my proven flow for fitting rear view camera to car. I use it in the shop to avoid backtracking and to catch bad parts early.
-
Bench test the kit
Connect the camera to the monitor on a bench with a 12 V source. Check image, gridlines, and night mode. This 5-minute step has saved me hours when a part was DOA. -
Plan the mount point
Aim for centered and just above the bumper. Make sure the plate and lights stay legal and visible. -
Mount the camera
Use the plate frame, handle mount, or drill for a flush fit. Deburr holes and add a grommet. Seal edges to keep water out. -
Route the cable
Follow the trunk lid loom into the cabin. Use fish tape along the sill trims to the dash. Zip tie to factory paths. Keep video cables away from thick power wires to reduce noise. -
Power and reverse trigger
Find the reverse light wire in the trunk with a multimeter. It should read 12 V only in reverse. Use a fuse tap or T-tap and add an inline fuse if powering the camera from the front. Ground to bare metal with a ring terminal. -
Connect to the display
For a mirror or dash monitor, plug in the RCA video and reverse trigger. For a head unit, use the “Reverse In” RCA and the “Reverse” trigger wire per the manual. Some OEM radios need a specific 6 V feed or a camera adapter. -
Reassemble and tidy
Secure slack with zip ties. Keep wires clear of moving hinges and latch rods. Reinstall trims gently to avoid clips breaking. -
Test and aim
Reconnect the battery. Put the car in reverse with the brake on. Adjust the tilt so you see the bumper edge at the bottom and about 3–4 feet behind you in the center. Tighten all screws.Source: amazon.com
Wiring tips, triggers, and integration
Small wiring choices make or break image quality. When fitting rear view camera to car, pay close attention to the reverse trigger and power path.
Clean power and ground:
- Use a known good chassis ground. Sand paint to bare metal.
- If you see flicker, try powering the camera from a clean accessory source and use the reverse light only for trigger.
Reverse signal options:
- Reverse light 12 V is common and simple.
- CAN bus adapters can provide a clean reverse signal when bulbs are LED or pulse-width modulated.
- Some factory radios supply 6 V to the camera. Use a step-down converter if needed.
Wireless setups:
- Keep power leads short and solid.
- Avoid running the transmitter near high-current lines like fuel pumps.
- If you see interference, add ferrite beads and move the module.
Head unit settings:
- Enable “Camera” in the menu.
- Pick NTSC if the screen allows format choice.
- Turn gridlines off in either the camera or the head unit if you see double lines.
Source: rearviewsafety.com
Aiming, calibration, and on-screen guidelines
Good aim beats pure megapixels. When fitting rear view camera to car, spend time on aim and overlays.
Fast calibration steps:
- Park on level ground with the wheels straight.
- Place painter’s tape lines at 3 ft and 6 ft behind the bumper.
- Tilt the camera until you just see the bumper edge at the bottom of the screen.
- Use the tape lines to match your on-screen grid to real space.
Fine-tune the image:
- Boost brightness for night, lower for bright days.
- If your kit has wide dynamic range, turn it on to handle sun and shade.
- Turn off mirror mode only if the image looks reversed on a front camera input.
Source: ebay.com
Legal, warranty, and safety notes
The goal is a clean, safe, and legal add. When fitting rear view camera to car, keep these points in mind.
Legal checks:
- Do not block the plate or its light.
- Keep lights and reflectors clear.
- New US cars must have rear visibility features. Your retrofit should meet basic safety norms.
Warranty and airbag safety:
- Use non-invasive fuse taps when you can.
- Avoid running wires near curtain airbags in the roof rails.
- Disconnect the battery before touching SRS or steering-area trims.
Body and water protection:
- Use grommets for any new hole. Seal with automotive-grade sealant.
- Keep wiring away from sharp edges and hinges.
Cost, time, and value
Let’s set real expectations. When fitting rear view camera to car, plan your budget and time.
Typical costs:
- Camera 25–250 dollars depending on features and build.
- Display 30–150 dollars for mirror or dash monitors. Head units vary more.
- Wiring, trims, and small parts 10–40 dollars.
- Pro install 150–400 dollars in most markets.
Time:
- DIY wired install 1–3 hours for a sedan. Trucks and SUVs can take longer.
- Wireless kits cut routing time but may need extra tuning for signal.
Value:
- Fewer dings and faster parking save money and stress.
- Towing and trailer work get easier.
- A neat install can help resale and buyer confidence.
Troubleshooting and maintenance
Even clean work can need a tweak. When fitting rear view camera to car, here is how I solve common issues.
No image or blue screen:
- Check the reverse trigger has 12 V in reverse.
- Confirm the video format matches the screen input.
- Test with a spare RCA cable to rule out a bad lead.
Rolling lines or noise:
- Improve ground. Try a shorter, cleaner ground point.
- Separate video from power runs. Add ferrite cores.
Image flips or two sets of lines:
- Turn off extra gridlines in the camera or head unit.
- Toggle mirror mode to correct a reversed picture.
Night vision weak:
- Clean the lens. Aim slightly down.
- Upgrade to a camera with better low-light spec when needed.
Simple care:
- Wipe the lens when you fuel up.
- Recheck zip ties and mounts after the first week and after car washes.
Frequently Asked Questions of fitting rear view camera to car
Do I need to disconnect the battery before installation?
Yes. Disconnecting the negative terminal prevents shorts and airbag faults. It also protects sensitive electronics while you tap power.
Can I power the camera from the reverse light?
Yes, that is common and simple. Use a multimeter to confirm the correct wire and add an inline fuse.
Will a wireless camera work as well as a wired one?
Wireless is easier to route but can face interference. Wired gives a cleaner, more reliable picture in most cars.
Can I add a camera to my factory head unit?
Often yes. Check if your unit has a camera input and a reverse trigger wire. Some cars need an adapter or a 6 V power feed.
How high should I mount the camera?
Mount it just above the bumper and centered. Aim so the bumper edge sits at the bottom of the screen with a clear view 3–4 feet back.
What if my image is reversed or upside down?
Use the camera’s small selector loop or menu setting to flip. Many head units also offer a mirror/normal toggle.
How long does fitting rear view camera to car take?
Most DIY installs take 1–3 hours. Add time for SUVs, trucks, or if trim is tight.
Is drilling into the bumper safe?
Yes if done with care and grommets. Avoid crash beams and use sealant to prevent water entry.
Do I need parking guidelines on the screen?
They help depth judgment, so I recommend them. If your head unit draws its own lines, turn off the camera’s lines to avoid overlap.
Will the camera drain my battery if wired wrong?
If powered from a constant source, it could. Always use a switched source or the reverse light with a proper trigger.
Conclusion
You now have a clear plan for fitting rear view camera to car from start to finish. Pick the right kit, map the route, wire it clean, and take time to aim. A careful test and tidy install will give you a sharp, stable view every time you shift to reverse.
Make your next drive easier and safer. Gather your tools, follow the steps, and start fitting rear view camera to car this weekend. If you found this helpful, subscribe for more DIY guides or drop a question in the comments so I can help you one-on-one.