
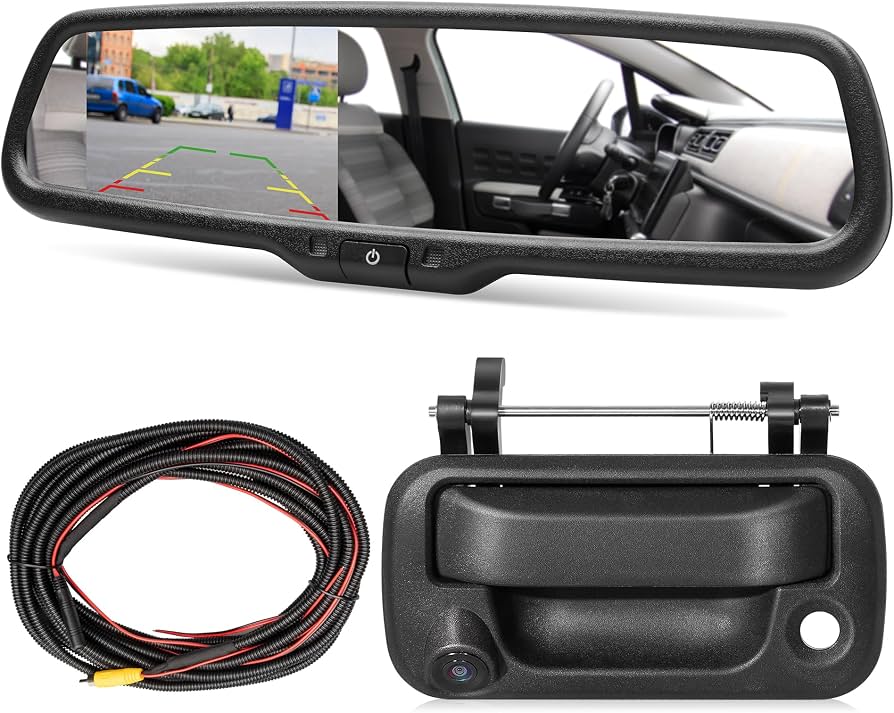
Backup cameras for pickups cut blind spots, prevent fender benders, and speed up hitching.
If you drive a truck, you know the blind zone is real. Backup cameras for pickups turn that stress into a clear view. I have wired, mounted, and tested many kits on daily drivers and work rigs. This guide shares what works, what fails, and how to buy with confidence. Read on to get the best setup for your pickup and your budget.

What Are Backup Cameras for Pickups?
A backup camera is a small, wide-angle camera at the rear of your truck. It sends live video to a screen on your dash, mirror, or head unit. You see what is behind you as you shift into reverse.
Here is the flow:
- The camera powers on when you go into reverse.
- It sends video to your display.
- Parking lines help you judge space and angle.
Most modern pickups come with a camera from the factory. Many older trucks do not. Add-on kits make it easy to upgrade. The result feels like a superpower. You see the trailer hitch. You see low posts. You see kids’ bikes.
Why Backup Cameras for Pickups Matter
Trucks sit high. The rear blind zone can hide a whole person. Federal crash data shows rear cameras cut back-over crashes. That makes them more than a nice add-on. They are a safety tool.
There is also a legal angle. Since 2018, new light vehicles in the U.S. must include rear visibility tech. If your pickup is older, an add-on camera helps close that gap.
Insurance and costs matter too. A camera can help prevent a single scrape. That alone may cover the price. It can also save time on job sites and while hitching. Less stress. Fewer repairs.
Types of Backup Cameras for Pickups
You will see a few core styles. Each can fit different needs and budgets.
- License plate mount. Simple, cheap, and fast to install. Good for most trucks.
- Tailgate handle camera. Clean, OEM-like look. Great if you want a factory style.
- Bumper flush mount. Low and centered. Needs a drilled hole and care to aim.
- Third brake light camera. High mount for wide view. Nice for tall caps and towing.
- Trailer cameras. Use them on the trailer, RV, or camper. Often wireless.
For displays, you have options too:
- Mirror monitors. Clip-on or replacement mirrors that show video.
- Standalone 5 to 7 inch screens. Easy to place. Good for work trucks.
- Head unit integration. Use your factory or aftermarket radio screen.
Key Features That Make a Difference
Look for features that fit your truck and use case. Here is a quick map.
Image and lens
- Resolution: 720p is fine. 1080p AHD is sharper and common now.
- Field of view: 150 to 170 degrees is standard. Wider sees more, but can distort edges.
- HDR or WDR: Helps with glare, snow, and night lights.
- Low light spec: 0.1 lux or better is great. IR LEDs help, but can bloom on plates.
Build and weather
- Waterproof rating: IP67 is good. IP69K is best for pressure wash and mud.
- Temperature range: Check it if you live in heat or deep cold.
- Vibration rating: Useful for off-road and gravel.
Parking lines and views
- Static grid lines: Simple and accurate if you aim the camera well.
- Dynamic lines: Move with your steering. Need data from the truck or the head unit.
- Hitch view: Zoom or aim down to see the ball and coupler.
- Split screen: Show two to four cameras at once.
Power and add-ons
- Fast boot: Good cameras wake quick. Cheap ones lag.
- Trigger wire: Turns the screen on in reverse and can trigger a second view.
- Recording: Some systems record video like a dash cam.
Wired vs. Wireless: Which Should You Buy?
Wired backup cameras for pickups
- Best image and least lag.
- Fewer dropouts with long beds and trailers.
- Needs a video cable run front to back.
Wireless backup cameras for pickups
- Faster to install. Great for trailers and rentals.
- Can have interference from LEDs and 2.4 GHz gear.
- Pick a digital wireless kit for better range and stable image.
My rule of thumb:
- Go wired for daily use and work trucks.
- Go wireless for a trailer, camper, or quick swap setups.
Installation: Step-by-Step and Pro Tips
You can DIY backup cameras for pickups in an afternoon. Here is a simple plan.
Tools
- Trim tools, crimper, tape, zip ties.
- Test light or multimeter.
- Drill and step bit if needed.
Steps
- Mount the camera. Center it over the plate, bumper, or hitch. Aim level.
- Route the cable. Run along the frame or through the tailgate loom. Avoid sharp edges.
- Find reverse power. Tap the reverse light wire for trigger power. Ground to clean metal.
- Add a fuse. Use an inline 1 to 3 amp fuse near the tap.
- Run video to the front. Use grommets and loom. Keep away from hot or moving parts.
- Mount the display. Mirror, dash, or head unit. Keep the view clear.
- Test and aim. Check at night and in sun. Adjust tilt for the hitch and horizon.
Pro tips from the field
- Clean grounds fix most flicker and noise.
- Use dielectric grease on plugs. It helps in rain and snow.
- Leave a drip loop before any cable enters the cab.
- If lines are off, fix the aim first. Then tweak the overlay.
Integration With Factory Screens and Smart Features
Many trucks can show the camera on the stock screen. Use a T-harness made for your year and radio. It avoids cutting wires and keeps steering wheel controls.
You can also add extras:
- Cargo bed camera for fifth-wheel checks.
- Side cameras for lane changes and tight docks.
- Trailer camera input, if your truck supports it.
Some systems read steering angle and add dynamic lines. Others add a 360 view with extra cameras. These upgrades work best with brand-matched kits and a pro install.
Best Use Cases: Towing, Work Sites, and Off-Road
Towing
- Aim the lens down to see the hitch ball.
- Use a hitch view or zoom mode to line up fast.
- A trailer camera helps when the trailer blocks your tailgate camera.
Work trucks
- A 7 inch monitor is easy to see with gloves and dust.
- Pick IP69K gear for wash bays and mud.
- Add a front camera for tight docks and ramps.
Off-road
- A rear camera helps when backing on narrow trails.
- Pick a lens with HDR for sun and shade.
- Bring a soft brush to clear mud or snow.
Costs, Warranties, and Trusted Brands
You can outfit backup cameras for pickups at many price points.
Price ranges
- Under 100 dollars: Basic kits. Good image. Fewer features.
- 100 to 250 dollars: Better optics, weather seals, and faster boot.
- 250 to 600 dollars: OEM-style fit, 1080p, DVR, trailer support.
- Pro systems: Fleet-grade builds. Multi-cam. Strong support.
What to check before you buy
- Warranty: At least one year. Two is better.
- Support: Clear manuals and U.S.-ready tech help.
- Returns: Make sure there is an easy swap if the lens angle is wrong.
From my installs, spend a bit more on the camera itself. A sharp, sealed camera outlives a cheap one by years.
Care, Maintenance, and Troubleshooting
Simple care keeps backup cameras for pickups clear and sharp.
Care
- Wipe the lens often. Use a soft cloth.
- Add a hydrophobic spray before winter or mud trips.
- Check cable clips after rough roads.
Fix common issues
- Black screen: Check the fuse and reverse trigger.
- Rolling lines: Reseat grounds. Keep power and video apart.
- Night glare: Tilt the camera slightly down. Turn off IR if it blooms.
- Water drops on lens: Clean and reapply water repellent.
If you still have issues, test on a bench with a spare 12V source. That splits truck wiring issues from gear faults.
Frequently Asked Questions of backup cameras for pickups
Are backup cameras for pickups worth it on older trucks?
Yes. The safety boost is big, and it helps with hitching and parking. One avoided scrape can pay for the kit.
Can I install a backup camera without drilling my bumper?
Yes. Use a license plate mount or a tailgate handle camera. These look clean and avoid holes.
Do wireless backup cameras lag too much for hitching?
Good digital wireless kits have low lag. They work fine for hitching if the antenna path is clear.
Will a backup camera work with my factory screen?
Often yes. Use a year-specific T-harness or interface. Check your radio model before you buy.
What field of view should I choose?
Around 150 to 170 degrees is ideal. It shows a wide scene without heavy edge warp.
How do I power a backup camera on a trailer?
Use the trailer’s running light circuit and a fused lead. Pair it to a wireless monitor in the cab.
Can I record video from my backup camera?
Some monitors and head units support DVR recording. Look for a kit that includes a card slot.
Conclusion
Backup cameras for pickups make driving safer and simpler. You get a clear view, faster hitching, and fewer surprises at the job site. Pick the right style, wire it clean, and aim it well.
Start with your use case. Daily driving, towing, or work? Choose wired for best image, or wireless for trailers and quick installs. Then add features like HDR, hitch view, and IP69K to match your roads and weather.
Ready to gear up? Use this guide to plan your build, compare kits, and install with confidence. If you want more tips or brand picks by truck model, subscribe and drop your questions in the comments.